workshop sheds
Workshop sheds are no longer just an afterthought when it comes to backyard planning. With the right design, they can become a highly functional space for woodworking, crafting, home repairs, or even a full-fledged small business workspace. Whether you’re a weekend hobbyist or a professional contractor, building the perfect workshop shed can elevate your productivity, improve organization, and provide a dedicated area to pursue your passions.
In this guide, we’ll walk you through the key elements of designing the ideal workshop sheds for your backyard, including layout planning, material selection, utilities, and customization tips.
Step 1: Determine the Purpose of Your Workshop Shed
Before you begin designing your shed, ask yourself what its primary function will be. The answer will guide everything from its size to its interior setup.
Common purposes for workshop sheds include:
- Woodworking or carpentry
- Mechanical or automotive repair
- Metalworking or welding
- Art, painting, or crafting studio
- Home office with hands-on capabilities
- Tool and hardware storage
Understanding how you’ll use the shed helps you plan for electrical needs, ventilation, lighting, and structural features.
Step 2: Choose the Right Size and Location
The size of your workshop shed depends on how much space you need for equipment, storage, and workspace.
Considerations when deciding size:
- Do you need space for large tools like a table saw or workbench?
- Will multiple people be using the shed at once?
- Do you plan to expand your tool collection or services in the future?
Once you’ve determined the size, find a location that offers:
- Easy access from your home
- Good drainage and sunlight
- Enough clearance for doors, ramps, or expansion
- Space for landscaping or outdoor work areas
Workshop sheds need both interior space and some breathing room around them for convenience and safety.
Step 3: Select Durable, Low-Maintenance Materials
Workshop sheds should be built to last. The right materials will ensure the structure holds up against weather, pests, and daily use.
Best materials for workshop sheds:
- Wood: Offers a traditional aesthetic and is easy to customize, but requires regular maintenance.
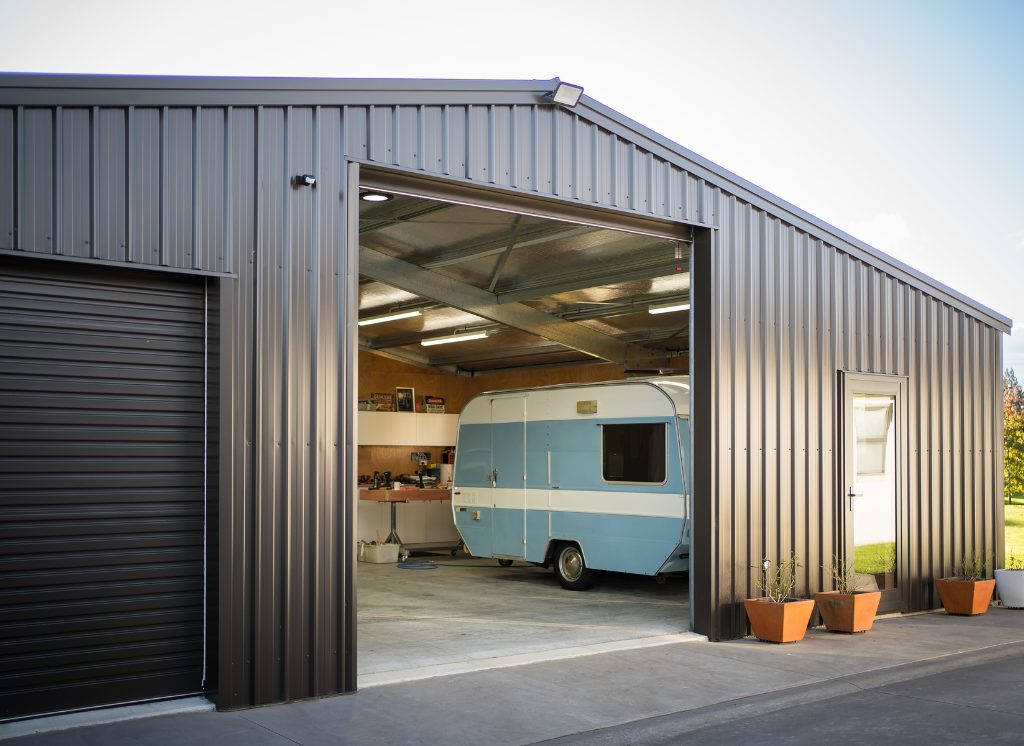
- Metal: Resistant to fire and pests, low maintenance, but may require insulation to control heat.
- Vinyl or Resin: Low maintenance, weather-resistant, and easy to clean, but less customizable.
Choose high-quality roofing materials (metal or architectural shingles) and weatherproof siding to extend your shed’s lifespan. A pressure-treated lumber base is ideal for withstanding moisture.
Step 4: Design a Functional Interior Layout
The interior of your workshop shed should be both efficient and comfortable. This is where thoughtful planning pays off.
Must-have interior elements:
- Workbenches: Position at least one large work surface in a central or wall-mounted area.
- Storage Solutions: Use a mix of pegboards, wall-mounted cabinets, shelving units, and drawers to keep tools organized.
- Flooring: Choose a durable, easy-to-clean surface like sealed concrete, vinyl tile, or treated wood.
If you’ll be working with heavy tools, make sure the floor can support the load and that there’s enough room to move around safely.
Step 5: Add Electrical, Lighting, and Ventilation
A well-lit, powered, and ventilated shed is essential for productivity and safety.
Electrical setup for workshop sheds:
- Power outlets: Install outlets at bench height and near each workstation.
- Lighting: Use bright, overhead LED lights along with task lighting over benches.
- Ventilation: Include gable or ridge vents, windows, and possibly an exhaust fan—especially if working with fumes, paint, or sawdust.
If your workshop sheds will be used year-round, consider adding heating or air conditioning, or even insulation for temperature control.
Tip: Always hire a licensed electrician for installation to meet code and ensure safety.
Step 6: Make It Comfortable and Inspiring
Just because it’s a workshop doesn’t mean it has to be dull or sterile. Add personality and comfort so the space inspires you to create.
Design enhancements to consider:
- Paint the interior walls a light color to reflect light and make the space feel larger.
- Hang artwork, a clock, or even motivational posters.
- Add a comfortable chair or stool, and maybe a small coffee station or mini fridge for breaks.
Workshop sheds should support long hours of creative work, and comfort plays a big role in that.
Step 7: Secure Your Shed
Workshop sheds often contain valuable tools, materials, and projects—so security is a must.
Ways to secure your workshop:
- Use solid-core doors with heavy-duty locks
- Install motion-sensor lights outside
- Add a simple alarm system or smart cameras
- Anchor large equipment to the floor
If you live in a storm-prone area, consider anchoring the entire shed structure for added protection.
Step 8: Customize the Exterior
Don’t forget the exterior! The outside of your shed should complement your yard and home design.
Exterior ideas:
- Paint or stain the exterior to match your house
- Add landscaping such as flower beds or a paver path
- Install an awning or small deck for outdoor work or relaxation
Workshop sheds can be just as attractive as they are functional, enhancing both your yard’s appearance and utility.
Final Thoughts
Designing the perfect workshop sheds takes planning, but the result is a tailored, personal workspace that boosts your efficiency and enjoyment. From layout and materials to lighting and comfort, each decision contributes to the shed’s usability and longevity.


